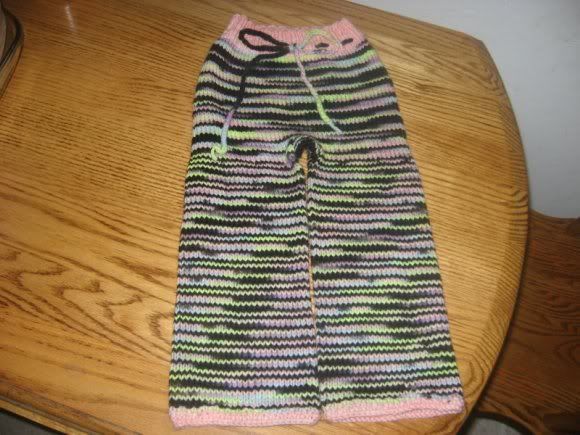
Note: I just quickly typed this up. I'll address any mistakes as I come across them!

Knitting know-how needed:
Knit/Purl
M1B, M1F increases (great videos available at www.knittinghelp.com)
Short row shaping for maximum booty space in back
~~~~~~~~~~~~~~~~~~~~~~~~~~~~~~~~~~~~~~~~~~~~~~~~~~~~~~~~~~~~~~~~~~~~~~~~~~~~~~~~~~~~~~~~~~~~~~~~~~~~~~~~~~~~~~~
First, pick out your yarn. If you are using these pants as diaper covers, they need to be 100% wool. Keep in mind these will be on a baby, so look for softer yarns. I look for worsted or aran weight yarn.
Secondly, knit a gauge swatch using the needles for the main body. I usually use a 7 or 8 for the main body and a 5 for the waistband. This pattern is knit on the round, so you'll need a 16 inch circular in each size and 12 inch circular for legs or dpns in the larger size.
Now - measure the babe. You need to measure waist, rise, hip and inseam.

Calculate stitches needed for size and round up waist to the next number divisible by 8.
Cast on number of stitches on smaller sized needles.
Waistband:
Knit in K2 P2 ribbing for desired length of waistband. I like about a 2 inch waistband.
Body:
Switch to larger needles. K to about 1 inch below waistband, then divide number of stitches in half. Use stitch markers to mark off what will be your hips (or little circles of yarn if you don't have markers). Work a short row (tutorials available online). Slip markers as you come to them.
K to 1 inch below short row and knit another short row. Repeat 1x. 3 sets of short rows. Remove markers.
Now you are going to knit until your work measures 2 inches smaller than intended rise. Use markers to mark exact center front and center back of work.
Now we will work the gusset. K to 1 St before the CF marker, M1F, K2,M1B. Repeat at CB marker
Next Row: K all stitches
Next row: K to 2 St before CF Marker, M1F, K4, M1B. Repeat at CB marker
Next Row: K all stitches
Next row: K to 3 st before CF Marker, M1F, K6, M1B. Repeat at CB marker
Next row: K all stitches.
Repeat until the gusset measures 10 stitches across. K around
Split for legs:
K across front gusset. Continue on L leg with 12 inch circular or dpns, increasing stitches evenly as needed (M1B is a good invisible increase) for leg circumference until you get to the back gusset. Place the remaining stitches on a piece of waste yarn or stitch holder. K on the round to desired length, or stop short and add a cute cuff. I like the look of seed stitch, ribbing if you want to be able to cuff them, ruffles for girls! The options are indeed endless.
 *first leg finished, gusset stitches on holder, second leg in progress*
Next leg: Same as the first, leaving gusset stitches "live" on your holder.
Finishing gusset:
Place stitches on 2 dpns. Work a kitchener stitch/graft to join the front to back. Weave in ends.
Finishing: Weave in ends. Knit an icord and use a crotchet hook to pull it through the waist band. Lanolinize if using for a diaper cover and then put on a cute baby!


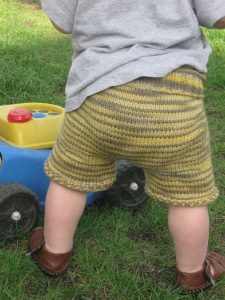
*F in longies circa 2007*


Great post! I have done several longies too, but always interested in a basic pattern!
ReplyDeleteWOW! Thank you!
ReplyDelete